First steps
Anything that only works unsandboxed will be noted, but regardless, we will assume you are creating an unsandboxed extension during this tutorial.
Let's start simple
Let's create the first beginnings of our extension.
Create a new JavaScript file (file extension is .js) and place a function that runs on start.
We'll want this function to take an input, a Scratch global object that is given to extensions.
This object gives us some tools we'll need for creating blocks.
The cleanest way to do this is like this:
(function(Scratch) {
  'use strict';

})(Scratch);
We are using a function with 'use strict' here to prevent any variables we create to enter the global scope.
This will prevent any weirdness once other extensions try to create variables or things with the same name.
Next let's create a class for our extension. This will be where most of the code for our extension will be.
This can be done as follows:
(function(Scratch) {
  'use strict';
  class Extension {

  }
})(Scratch);
We still have 1 more thing to add on before we can load this into Snail IDE.
Let's add the code to register this into Snail IDE, so we don't forget later.
(function(Scratch) {
  'use strict';
  class Extension {

  }
  Scratch.extensions.register(new Extension());
})(Scratch);
This is our first use of the Scratch object.
The extensions property of the Scratch object gives us some small information, and the ability to register our extension.
Defining our extension contents
Now that we have our basic stuff set down, let's define some properties about our extension.
Create a getInfo() method in our extension that returns an object:
class Extension {
  getInfo() {
    return {
      // ...
    };
  }
}
We could put a number of things into here:
Extension ID
This is a required property.
This should ideally only contain characters a-z and numbers 0-9.
Usually you'll also want to add your name at the start of the ID too to make sure it doesn't conflict with existing extensions.
Add it like so:
getInfo() {
  return {
    id: "johnMyExtension",
  };
}
Extension Name
This is a required property.
This is the name of the category for the extension. Don't make it too long or it'll look weird.
Add it like so:
getInfo() {
  return {
    id: "johnMyExtension",
    name: "My Extension",
  };
}
color1, color2, and color3
These all decide the color of the extension and it's blocks.
Most extensions only use color1 and color2, but you can use color3 too or even just not use any of them.
color1decides the main colorcolor2decides a secondary and "shadow" color for rounded menuscolor3decides an outline color

Add it like so:
getInfo() {
  return {
    id: "johnMyExtension",
    name: "My Extension",
    color1: "#ff0000",
    color2: "#00ff00",
    color3: "#0000ff",
  };
}
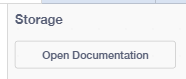
docsURI
| ❗ Docs URIs are currently not usable on Snail IDE for unknown reasons |
|---|
| This is usually not included in most extensions, but you can link to another web page that explains your extension. |
This will add a button to the top of the extension's category that links to the page.
Add it like so:
getInfo() {
  return {
    id: "johnMyExtension",
    name: "My Extension",
    docsURI: 'https://example.com', // change the website link to anything
  };
}
Let's make a block
So we've talked about what the category needs, but we haven't touched blocks.
To start with creating a block, we need to first add an array to the extension that contains our blocks:
getInfo() {
  return {
    id: "johnMyExtension",
    name: "My Extension",
    blocks: [
      // our blocks will go here
    ],
  };
}
Let's create a basic block that just logs to the console.
To do this, we first need to create a method in the class.
Let's call it logToConsole():
class Extension {
  getInfo() {
    // our earlier code is here...
  }

  logToConsole() {
    console.log('Hello world!');
  }
}
Now let's create the block for this.
We need to add an object to the blocks array in the getInfo method, and the object needs the property opcode set to the name of our method.
This is done like so:
[
  {
    opcode: 'logToConsole'
  }
]
We want to add some text to the block.
This is what the user will see on the block itself.
This is done like so:
[
  {
    opcode: 'logToConsole',
    text: 'log to console'
  }
]
Our extension still wont be able to load with this block though, as we are missing one key thing:
Block Types
Our block needs to be a specific type of block.
Blocks have various different shapes and uses, so we need to pick the type of block we are making here.
Here is a table of available block types:
| Explanation | Image | Functional when sandboxed | |
|---|---|---|---|
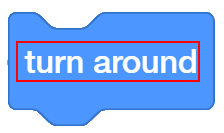
| Scratch.BlockType.COMMAND | A placable code block. Can't be placed inside holes. |  | ✅ |
| Scratch.BlockType.REPORTER | A round output block that returns a string, number, etc. |  | ✅ |
| Scratch.BlockType.BOOLEAN | A spiky output block that returns true or false. | 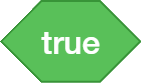 | ✅ |
| Scratch.BlockType.HAT | A block that activates the blocks below once a condition is true. Explained here. | 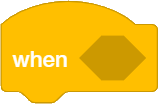 | ✅ |
| Scratch.BlockType.EVENT | An event block that will only run from external causes. Explained here. | 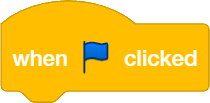 | ❌ |
| Scratch.BlockType.CONDITIONAL | A block that may run blocks inside based on a condition. Explained here. |  | ✅ |
| Scratch.BlockType.LOOP | A block that may run blocks inside multiple times. Explained here. | 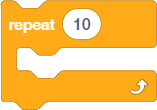 | ❓ |
| Scratch.BlockType.LABEL | Not used for real blocks. A text label in the category. Explained here. |  | ✅ |
| Scratch.BlockType.BUTTON | Not used for real blocks. A clickable button in the category. Explained here. | 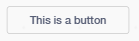 | ✅ |
| Scratch.BlockType.XML | Not used for real blocks. Injects XML to the category. Explained here. | No visuals for this block type | ✅ |
For now, we will only need the Scratch.BlockType.COMMAND block type.
This can be added as follows:
[
  {
    opcode: 'logToConsole',
    text: 'log to console',
    blockType: Scratch.BlockType.COMMAND
  }
]
Our example is done
Our example is done!
hello-console.js - View source
(function(Scratch) {
  'use strict';
  class Extension {
    getInfo() {
      return {
        id: "johnMyExtension",
        name: "My Extension",
        blocks: [
          {
            opcode: 'logToConsole',
            text: 'log to console',
            blockType: Scratch.BlockType.COMMAND
          }
        ]
      };
    }

    logToConsole() {
      console.log('Hello world!');
    }
  }

  Scratch.extensions.register(new Extension());
})(Scratch);
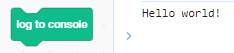
It should look like this:
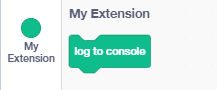
And clicking the block should log into console:
Next steps
Let's look into making a block that returns values.